Hard Cider is apple cider that’s been fermented to about 6 percent alcoholic content. It’s the cider equivalent of an ale or beer, and it’s generally pretty easy to make. This procedure is very simple, very unscientific, and designed for those folks who do not ferment regularly. If you have home-fermenting experience, feel free to use the same steps and equipment you would use to make a gallon of mead, malt-extract ale, or fruit/vegetable wine.
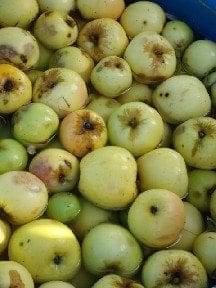
The cider you use must be raw and all-natural. If you do not have access to freshly pressed cider, you can use commercially-produced cider. Be sure to read the label carefully, though. Some commercially-produced ciders, especially those that are bottled, contain chemicals that inhibit fermentation. Fermentation is an important part of making hard cider so cider that contains any chemicals or additives to prevent it will not make good hard cider.
You can purchase wine, hard cider, or ale yeast from a home winemaking or brewing shop. Any yeast that has been developed for fermenting drinks will work well. I use Montrachet yeast most often but have also used champagne and premier cuivee to good effect. Do not use bread yeast.
When choosing your fermentation container, keep in mind that fermentation can sometimes create foam and always creates gas. You’ll want a container that gives you at least a few inches of head-space to prevent it from foaming-over with a lid that allows the gases to escape while preventing oxygen or air-born bacterias from entering. I use a fermentation bucket with an airlock I purchased from a home winemaking and brewing shop. I’ve seen cider successfully fermented in a large glass jug with a rubber band and a bit of plastic wrap fastened over the opening as well. A tight-fitting lid that does not allow the gases to escape is quite unwise.
Ingredients
- 3 quarts freshly pressed apple cider
- 1 quart water
- 1.5 pounds sugar or 2 pounds honey
- Yeast
Equipment
- a two-gallon fermentation container with an airlock
- a scale
- a pot
- a spoon made of a non-reactive, non-porous material
- bottles with caps for bottling your finished hard cider
Procedure
- Pour your cider into a clean fermentation container.
- Heat the sugar or honey with a quarter of water to a boil. Skim off any foam or scum that rises to the surface.
- Pour the sugar or honey and water mixture into the fermenter.
- When the brew is cool, pitch the yeast following the directions on the yeast packet and pour it into the fermenter.
- Cover your fermenter with an appropriate cover and airlock.
- Wait for your cider to ferment out. If you have an airlock. you’ll see when the airlock no longer bobs. It should take around two weeks, assuming you are fermenting at room temperature. If the temperature is considerably less than room temperature, it may take a lot longer. If the temperature is much higher, fermentation may go much faster or it may be inhibited. When you believe that your cider has fermented completely, give it a taste. It should be quite dry, meaning you should not taste any sugars or sweetness in your brew.
- Bottle your brew using bottles with good, tight-fitting lids such as those you can purchase at a home winemaking and brewing shop.
Storage and Use
When you are ready to bottle your hard cider, you’ll need to choose whether you want to drink it dry and flat, dry and bubbly, or sweet and flat. The only way to achieve sweet and bubbly is to keg your hard cider and carbonate it with pressurized carbon dioxide. In all cases, you’ll want to drink your hard cider sooner rather than later. Because the alcohol content is lower than that of wine, you don’t necessarily want to age it more than a few months. Aging is not at all necessary.
If you want dry, flat hard cider, you can add wine stabilizer that you purchased from a home wine-making and brewing store to prevent it from fermenting further (and potentially causing the bottle to explode) before you bottle it. Follow the instructions on the wine stabilizer that you purchased then bottle your brew.
If you want dry, sparkling cider, you will add a small amount of sugar to each bottle before you bottle the hard cider. The yeast in the hard cider will ferment the sugar, producing carbon dioxide that cannot escape because of the tight-fitting cap on the bottle, and the result will be fine bubbles in your brew. The danger is, of course, that you add too much sugar to your bottle, resulting in a few explosive or exploded bottles. I generally use a quarter of a teaspoon or less per bottle, and I watch my bottles carefully. It will take a week or two for the bottles to carbonate at room temperature. Store them in the refrigerator once you believe they’re just about to your liking.
If you want sweet, flat cider, use wine stabilizer to prevent further fermentation then add honey or sugar to achieve the level of sweetness you desire. Once you’re satisfied with the flavor, bottle your brew and cap it well.
If you keg your brew, follow the same procedures you would use for any of your other homebrews.