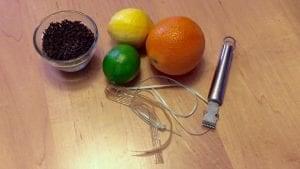
The pomanders of my youth were made by pushing an endless bowl of cloves into what seemed to be an oversized orange. These pomanders retain the lovely scent of spiced citrus but have a bit more variety and take much less time to create. This DYI includes instructions to prevent molding. Those of us that live in wet climates have to be extra careful. If you live in a dry area, this project will be done much quicker.
This project is kid friendly if the child is able to engage in projects lasting over 1 hour and has well developed fine motor skills. The same goes for adults.
There are other uses for pomanders. Bring a few to a holiday party. You can celebrate the tradition of exchanging a cloves for kisses. One version of the cloven orange/lemon involves giving the pomander to a person of interest so they can pull out a clove bud with their teeth. They munch on the clove and reward you with a kiss. Beware though. This person must then give the pomander to another person for another kiss exchange. Don’t let your heart be broken. It is supposed to be light hearted fun.
Equipment
- Citrus fruit
- Whole cloves
- 2 bowls (1 for whole cloves, 1 for rejected cloves)
- Ribbon
- Zester
- Thumb tack or short knitting needle (optional)
- Rubber bands (optional)
- Grinder (coffee grinder work well) (optional)
- Paintbrush (optional)
- Cinnamon powder (optional)
- Orris root powder (optional)
Instructions
- Make a plan for your finished design.
- Place the rubber bands around the fruit as a reminder of where the center of the fruit is so your design will keep shape.
- Using the zester, carve out a pattern in the peel of the fruit. Do not gouge the fruit. Even a shallow scrape will show significantly against the unpierced rind when it dries.
- Pour the cloves into a bowl.
- Using the sharp end of the clove bud, poke the clove into the peel of the fruit in accordance with your predetermined pattern. Place broken cloves in the second bowl for later use.
- If the cloves are brittle, poke your pattern first with a thumb tack or knitting needle to help it slid in easier.
- Once the pattern is basically established, remove the rubber bands and tie the ribbon around the fruit.
- Resume adding cloves until finished.
- If your clove pattern is sparce, your fruit may get molding. To preserve the pomander further, grind the broken cloves until powdered.
- Pour back into the second bowl. Add a little cinnamon powder and orris root powder as a preservative.
- Use the paint brush to dab the herbal powder on the exposed parts of the fruit.
- Hang your pomander in a dry, dark place unitl dry.


